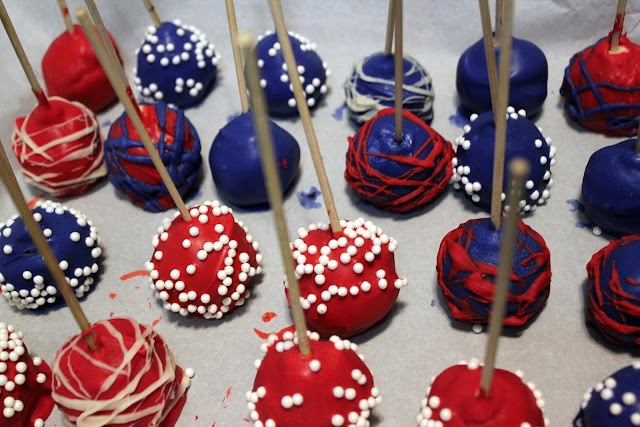
My daughter loves making cake pops! And why not? They are so delicious and fun to give out as treats on holidays. She whipped up some amazing ones for the 4th of July. Since my birthday (and my husband's birthday) is on the 3rd, they also doubled as little Birthday Cakes!
Here's what you'll need for these simple bites:
To make the pops, bake the cake according to the directions. After it has cooled, mash it up in a big bowl with your hands (kids can help if their hands are clean). Add in the frosting and mix it all up like meatloaf. Form into little cake "balls" and place on to a cookie sheet. Allow these balls to chill in the fridge for about an hour.
Now, you can melt your choice of candy melts according to the package. (We used the microwave.) Dip the candy sticks 1/2" into the melted candy, then immediately stick into a cake ball. When all the balls have sticks in them, put back into the fridge for 5 minutes. They will look like this:
Now, it's time to get creative! Melt the remaining candy melts in separate bowls and get your candy "decorations out." Play around by dipping, drizzling, and splashing the candy melts on the balls in various fashions. I really like the swirly patterns.
Adorn with the candy pieces in any way you like. These are such a fun way to let older kids participate. They can even have a contest to make the best design!
Finally, you can let the cake pops chill in the fridge until serving. If it will be longer than overnight, lightly cover with a sheet of plastic wrap for protection. Or you might want to invest in a cake pop tray.
These are so easy to make, and everyone loves them! Happy Birthday to me and my hubby -- and Happy Birthday, America!
Here's what you'll need for these simple bites:
- 1 box Pillsbury Red Velvet cake mix (plus, eggs, oil, and water as per the instructions for cake)
- 1/2 can cream cheese frosting (Betty Crocker Whipped! works best)
- 1 package Wilton candy melts (red)
- 1 package Wilton candy melts (white)
- 1 package Wilton candy melts (blue)
- Assorted Wilton edible decorations in red, white, blue or gold!
- Lollipop sticks ($4.99)
To make the pops, bake the cake according to the directions. After it has cooled, mash it up in a big bowl with your hands (kids can help if their hands are clean). Add in the frosting and mix it all up like meatloaf. Form into little cake "balls" and place on to a cookie sheet. Allow these balls to chill in the fridge for about an hour.
Now, you can melt your choice of candy melts according to the package. (We used the microwave.) Dip the candy sticks 1/2" into the melted candy, then immediately stick into a cake ball. When all the balls have sticks in them, put back into the fridge for 5 minutes. They will look like this:
Now, it's time to get creative! Melt the remaining candy melts in separate bowls and get your candy "decorations out." Play around by dipping, drizzling, and splashing the candy melts on the balls in various fashions. I really like the swirly patterns.
Adorn with the candy pieces in any way you like. These are such a fun way to let older kids participate. They can even have a contest to make the best design!
Finally, you can let the cake pops chill in the fridge until serving. If it will be longer than overnight, lightly cover with a sheet of plastic wrap for protection. Or you might want to invest in a cake pop tray.
These are so easy to make, and everyone loves them! Happy Birthday to me and my hubby -- and Happy Birthday, America!


Comments
Post a Comment